
Thumbprint Cookies
This post may contain affiliate links. Read the full disclosure here.
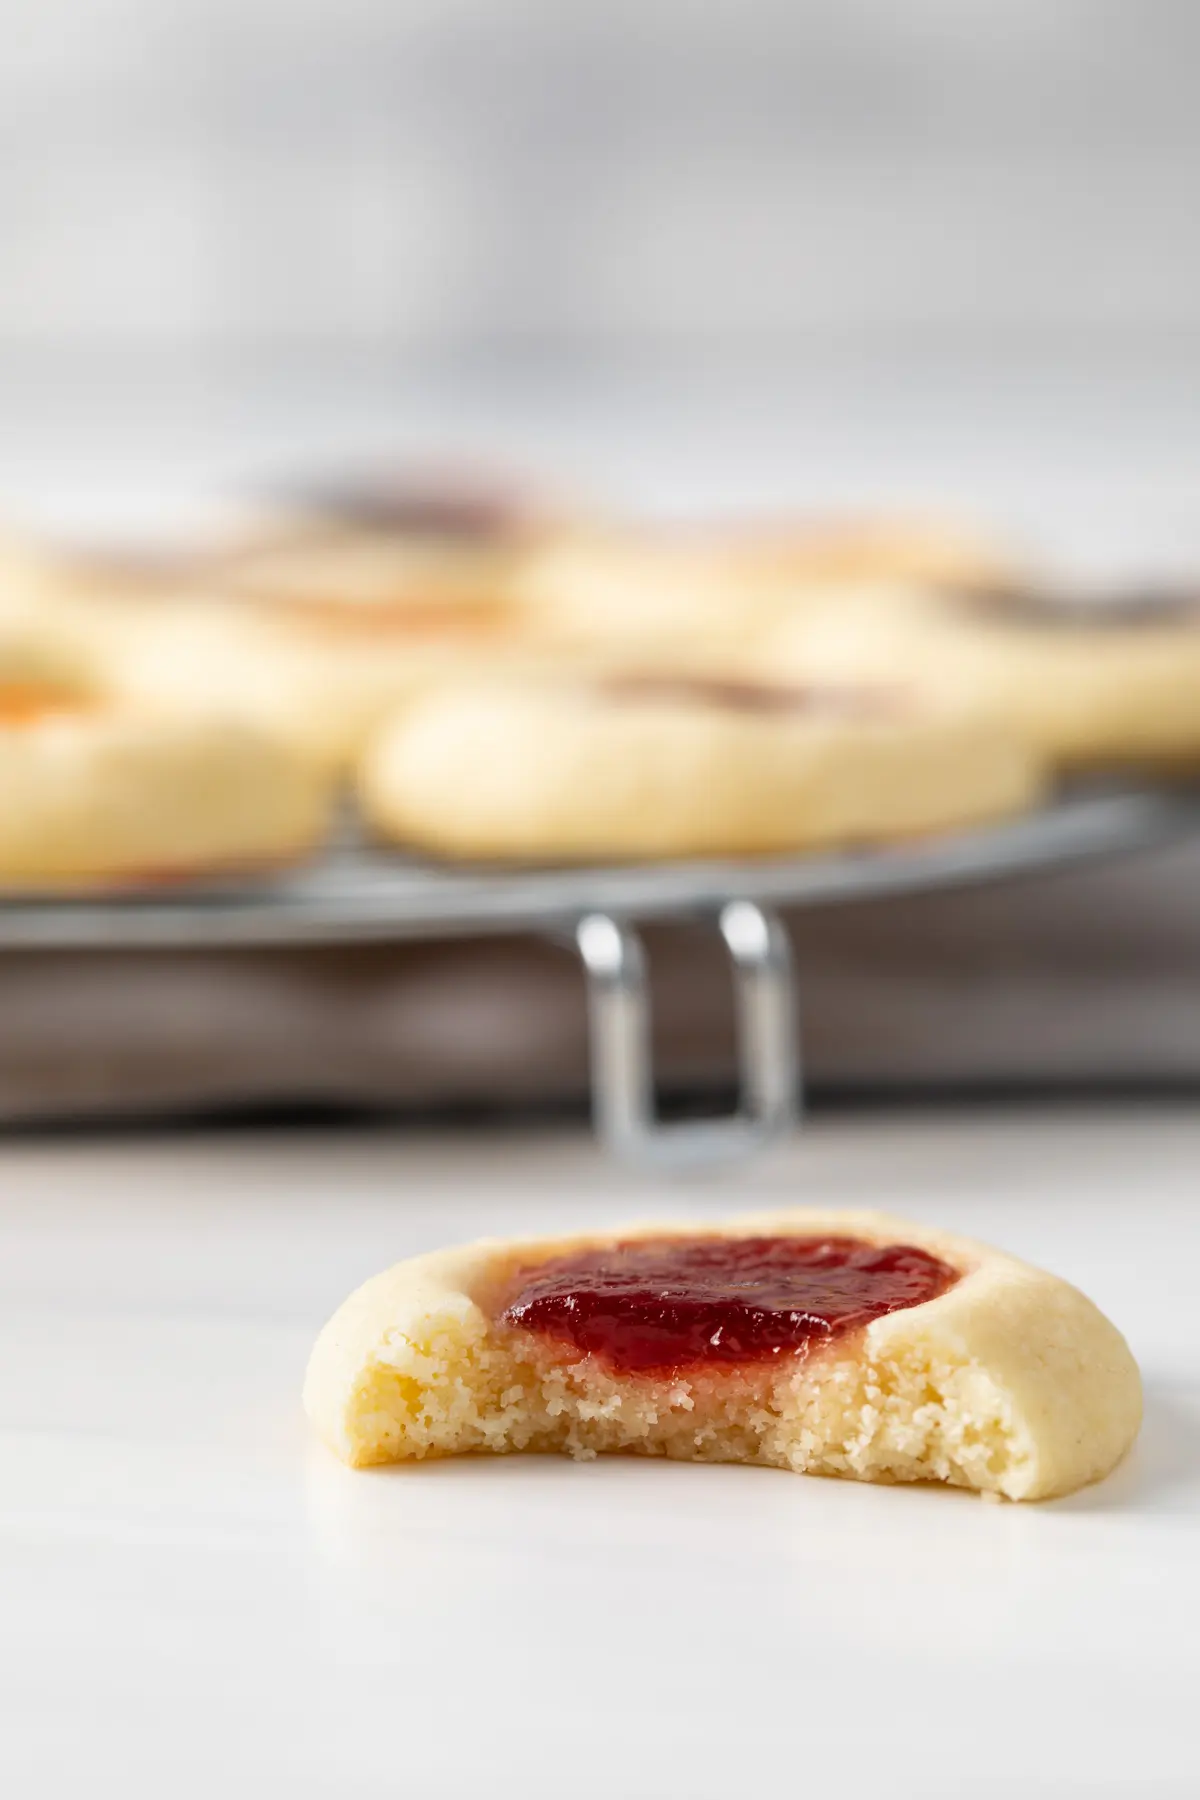
Thumbprint cookies are enriched, buttery shortbread cookies filled with jam. These cookies are a holiday favorite!

Thumbprint cookies are basically butter cookies with a divot that is created by pressing a thumbprint into the center.
This divot is often filled with raspberry jam. Other options can include your favorite flavor of jam, jelly, marmalade, lemon curd, chocolate, dulce de leche, or caramel.
The cookies are known as “Hallongrotta” in Swedish which means raspberry cave. This is why raspberry is the most common jam flavor you see with thumbprint cookies.
They bake up so pretty and have a soft, crumbly texture that is hard to resist. Much like my Russian teacakes.
Why this recipe works
- The cookie dough is sturdy and holds its shape so you don’t have to worry about the cookies over spreading.
- The dough doesn’t need to be chilled! Mix it up, shape, and bake the cookies.
- Use any kind of fruit jam but I highly recommend choosing a seedless variety. It will make the cookies more enjoyable.
Thumbprint cookie recipe
I just adore thumbprint cookies. I’ve made a couple different varieties including lemon thumbprint cookies and dulce de leche thumbprint cookies. Today I’m sharing my favorite recipe for jam thumbprint cookies.
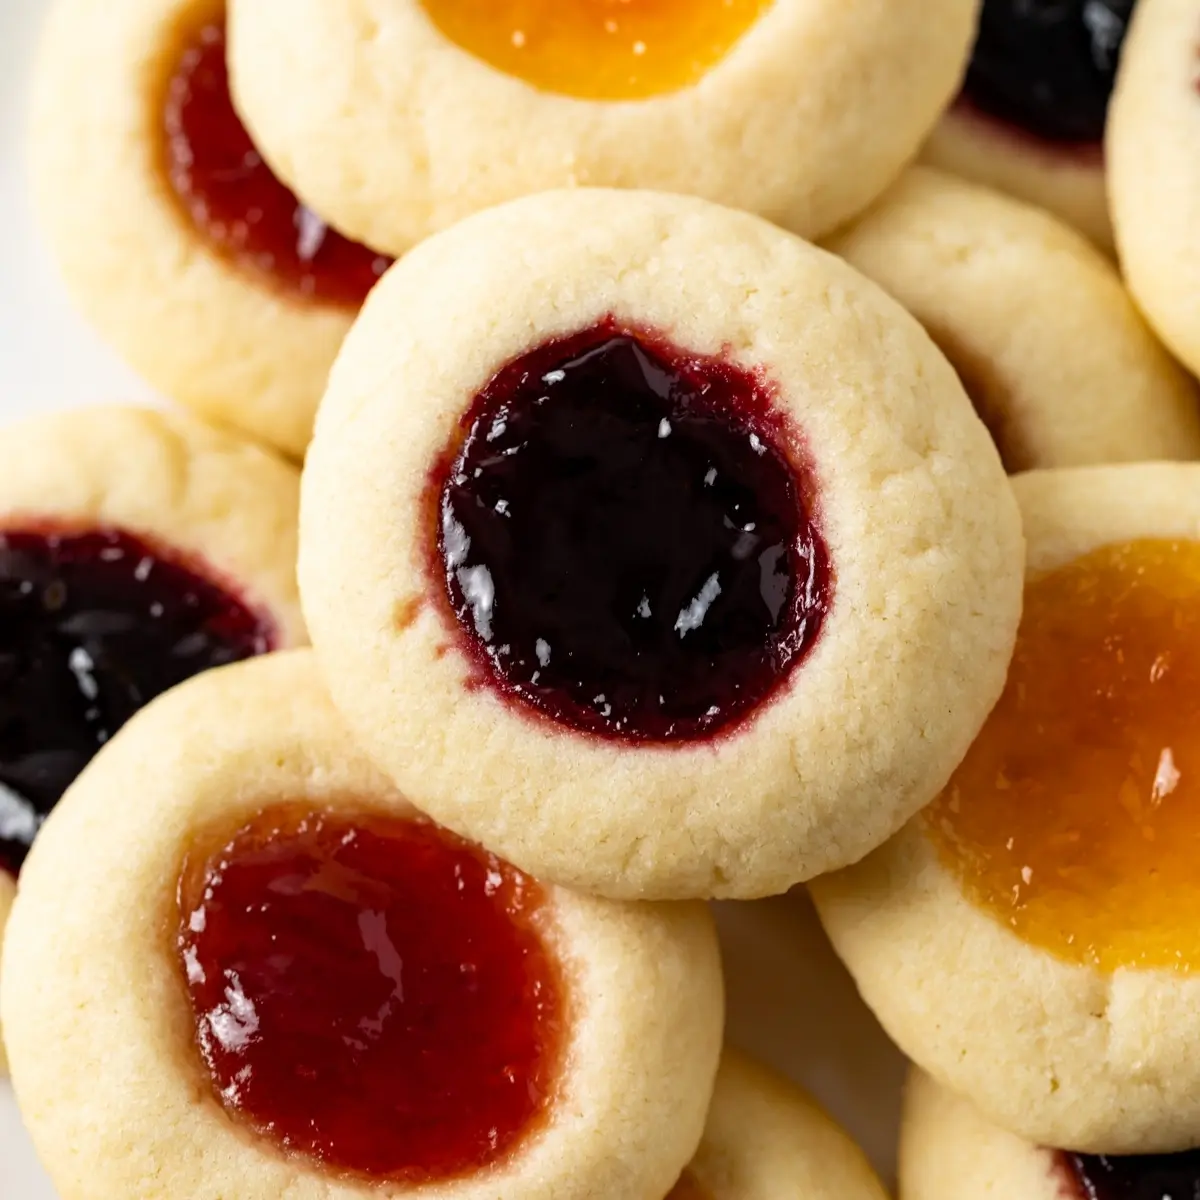
The cookie is soft, buttery, and not too sweet. This leaves room for the filling to be the star. For the cookies pictured, I used red plum, seedless blackberry, and apricot jam.
Rolling the cookie dough balls in finely chopped nuts is also a popular variation. And a white chocolate drizzle will make them look extra nice for the holidays.
Ingredients
The ingredient list is very simple.
- Butter: Use unsalted butter and allow it to come to room temperature before using.
- Sugar: Regular granulated sugar works best.
- Egg yolk: The yolks also need to be at room temperature before using.
- Vanilla: Use a high-quality pure vanilla extract.
- Flour: All-purpose flour is best for this recipe. I’ve not tested it with gluten-free flour so I can’t suggest using it.
- Salt: Just a bit to balance the flavors.
- Fruit jam: Use whatever you like best but make sure it’s seedless.
How to make thumbprint cookies
This recipe is easy and would be fun to do with kids. It also makes great cookies for the holidays!
The Dough – The cookie dough is mixed using the creaming method and doesn’t require chilling before baking.
The Filling – Use storebought or homemade jam for the filling.

Step 1: Make the dough
Start by creaming the butter and sugar together for about 3 minutes. This will give the cookies their soft, tender texture.
Next beat in the egg yolks, vanilla, and salt until well combined.
Add all of the flour and mix just until no streaks of dry flour are visible. You may need to stop and scrape down the sides of the bowl to get all of the flour incorporated.


Step 2: Shape the cookies
Use a 1-tablespoon cookie scoop to portion the dough and roll into balls. Place the cookie dough balls on a baking sheet lined with parchment paper.
Using either your thumb or the back of a teaspoon, make an indention in the center of each dough ball. If the dough cracks, gently press it back together.
Fill the indentions with about ¼ teaspoon of jam.

Step 3: Bake
Bake the cookies at 350°F for 12-14 minutes. The bottom edges will be lightly browned once the cookies are ready.
Allow the cookies to cool on the pan for 5 minutes, then transfer to a wire rack to cool completely.

Tips for success
- Use quality jam or make the jam yourself. I also suggest using seedless jams.
- Sometimes homemade jam can be a little watery. Cook it longer to reduce the moisture content. This will make it better for the cookies.
- Weigh the ingredients. If you use too much flour by mistake, the cookie dough will be dry and difficult to work with.
- As you make the indentions in the dough balls, the dough may crack. This is perfectly fine and normal. You can gently pinch the cracks back together and smooth them out before adding the jam.
- To avoid cracks altogether, make sure the dough isn’t chilled, roll the dough balls as smooth as possible, then immediately press the indent after rolling. Don’t roll all the balls then press the indent, do it after forming each ball.
- Add the jam before baking the cookies! The heat from the oven will “set” the jam (evaporating excess moisture) and the cookies will last longer.
- Use a teaspoon instead of your thumb to make indentions. This makes the cookies look neat and uniform.
Storing & freezing
To store: Keep thumbprint cookies in an airtight container at room temperature for up to 3 days or in the refrigerator for up to 6 days. Of stacking, layer parchment paper in between.
To Freeze: Transfer cookies to a freezer-safe container with parchment paper layered in between and freeze for up to 2 months.
Thumbprint Cookies
Ingredients
- 1 cup (227 g) unsalted butter, softened
- ¾ cup (150 g) granulated sugar
- 2 egg yolks, at room temperature
- 1 teaspoon vanilla extract
- ¼ teaspoon salt
- 2 ¼ cups (292 g) all-purpose flour, sifted
- ¼ cup (57 g) jam
Instructions
- Preheat the oven to 350ºF. Line 2 baking sheet with parchment paper or silicone mat; set aside.
- In a large mixing bowl, beat together the butter and sugar with an electric mixer on medium speed until smooth and creamy, about 3 minutes
- Beat in the egg yolks, vanilla, and salt. Add the flour and mix just until blended. Scrape down the sides and bottom of the bowl as needed.
- Shape the dough into 1 tablespoon size balls and place them 2 inches apart on the prepared baking sheet. Using your thumb or the back of a teaspoon, press a slight indention in the center of each ball. Take care not to press too far down. If the edges crack while making the indention, simply pinch them back together to smooth them out. Otherwise, the cracks are okay.
- Fill the indents with ¼ teaspoon jam.
- Bake for 12-14 minutes or until the bottom edges are lightly browned.
- Cool the cookies on the pan for 5 minutes before transferring them to a wire rack to cool completely.
Notes
- Jam: Use quality jam of any flavor or make the jam yourself. I also suggest using seedless jams. The cookies pictured are filled with red plum, blackberry, and apricot jam. Raspberry, strawberry, and lemon curd are great flavors to try.
- Sometimes homemade jam can be a little watery. Cook it longer to reduce the moisture content. This will make it better for the cookies.
- Weigh the ingredients. If you use too much flour by mistake, the cookie dough will be dry and difficult to work with.
- As you make the indentions in the dough balls, the dough may crack. This is perfectly fine and normal. You can gently pinch the cracks back together and smooth them out before adding the jam.
- To avoid cracks altogether, make sure the dough isn’t chilled, roll the dough balls as smooth as possible, then immediately press the indent after rolling. Don’t roll all the balls then press the indent, do it after forming each ball.
- Add the jam before baking the cookies! The heat from the oven will “set” the jam (evaporating excess moisture) and the cookies will last longer.
- Use a teaspoon instead of your thumb to make indentions. This makes the cookies look neat and uniform.
- Instead of jam, fill the cookies with chocolate ganache, caramel, or dulce de leche. Bake the cookies and fill them once they’ve cooled.
- Roll the cookie dough balls in sugar, sprinkles, or finely chopped nuts before filling.
- Store the cookies in an airtight container layered with parchment paper at room temperature for up to 3 days. Or in the refrigerator for up to 6 days.
- The cookies will keep for up to 2 months stored in the freezer. Thaw in the refrigerator overnight.
- The cookie dough will keep for up to 2 months in the freezer. Thaw in the refrigerator overnight.
Nutrition
The nutrition information provided is for convenience and as a courtesy only. It is not guaranteed to be accurate because nutrition information can vary for a variety of reasons. For precise nutritional data use your preferred nutrition calculator and input the exact ingredients and brands you used in the recipe.
Hi Jen… I baked this recipe today and am so so pleased with it. They are delicious!! I’ve shared it with my daughter and friends. Thank you !!
I’m so happy to hear this!
What about subbing the four for GF? Same amount? Same great taste?
Unfortunately, I haven’t tested this recipe with gluten-free flour.
made these yesterday with my homemade rhubarb jam, although they only took 8 minutes in my convection toaster oven. Turned out so tender and delish!